Welcome to your go-to guide for building a strong, long-lasting retaining wall in Wellington. Whether you’re sprucing up your backyard or managing a tricky slope, choosing the right materials is the first—and most crucial—step toward a successful project. Wellington’s unique terrain and weather conditions mean not just any materials will do; you need ones that can handle moisture, movement, and time. In this post, we’ll break down everything you need to know—from core building supplies to drainage essentials—so you can plan confidently, shop smart, and build a wall that stands the test of time.
The materials needed for a retaining wall in Wellington typically include treated timber or concrete blocks for the structure, crushed rock or gravel for the base, perforated drainage pipe, landscape fabric, and fastening hardware like galvanized screws or wall ties. Due to Wellington’s hilly terrain and wet climate, proper drainage materials and a solid foundation are essential for long-term stability.
Table of Contents
Why Build A Retaining Wall In Wellington?
Wellington’s dramatic, hilly landscape is one of its most defining features—but it also presents unique challenges for homeowners and property developers. From steep slopes to unpredictable soil movement and excess surface runoff, managing land in Wellington often requires smart, structural solutions. One of the most practical and visually appealing ways to tackle these issues is by building a retaining wall.
- The geography of Wellington: Due to its position between the hills and the coast, many Wellington properties are built on uneven or sloped terrain. While these views can be stunning, the land itself may not always be stable. Slopes are prone to erosion, especially during the wet winter months, and properties built on inclines can experience issues with soil shifting, poor drainage, and loss of usable outdoor space.
- Soil movement and drainage: Heavy rainfall, common in Wellington, can lead to water pooling and flowing down slopes, weakening soil stability over time. Without proper support, this can damage foundations, fencing, gardens, and outdoor living areas. A well-constructed retaining wall acts as a barrier, holding back soil and redirecting water flow to prevent erosion and flooding.
- Council regulations: In many cases, walls under 1.5 meters in height do not require building consent in Wellington, but anything taller or load-bearing may need approval. While this isn’t usually a barrier, it’s something to keep in mind early in the planning process to avoid setbacks.
- Aesthetic and functional benefits: Beyond stability and drainage, retaining walls can drastically improve the usability and appearance of your outdoor space. They allow you to create level areas for planting, patios, or even small lawns, making your yard more accessible and enjoyable. With options ranging from natural timber to sleek concrete blocks, they can also enhance curb appeal and complement the architectural style of your home.
- A real example from Karori: We recently worked with a homeowner in Karori who struggled with a steep, unusable section at the back of their property. By installing a simple, cost-effective timber retaining wall, we were able to carve out a level garden area for planting and entertaining—turning a wasted space into a functional extension of their home.
Building a retaining wall in Wellington isn’t just about improving how your property looks—it’s often a necessary step toward protecting your land and maximizing its full potential. Whether you’re planning a DIY project or hiring a professional, investing in the right structure today can save you a lot of stress and cost down the line.
Overview Of Retaining Wall Types
When planning a retaining wall in Wellington, it’s essential to understand that not all retaining walls are created equal. The type you choose will directly impact the materials you need, the cost of construction, and the wall’s durability in the face of Wellington’s unique weather patterns and soil movement. Each wall type offers specific advantages and drawbacks, depending on your landscape needs, budget, and whether you’re building it yourself or hiring a professional.
Below is a detailed look at the most common retaining wall types, including what they’re best suited for and their pros and cons. This will help you make an informed decision before heading to your local supplier or contacting a builder.
Timber Retaining Walls
Timber retaining walls are a popular option in Wellington for homeowners looking for a simple, rustic look at an affordable price. These walls are typically constructed using treated pine or hardwood sleepers, which are stacked and secured with spikes or steel posts.
- Best For: Budget-conscious projects, small gardens, and DIY landscaping
- Pros: Easy to build, cost-effective, widely available in Wellington
- Cons: Shorter lifespan due to potential rot or insect damage, especially in wetter areas
While treated timber is designed to resist decay, Wellington’s damp climate can still shorten its longevity. However, when built properly with adequate drainage and sealing, timber walls can last for many years and add a warm, natural feel to outdoor spaces.
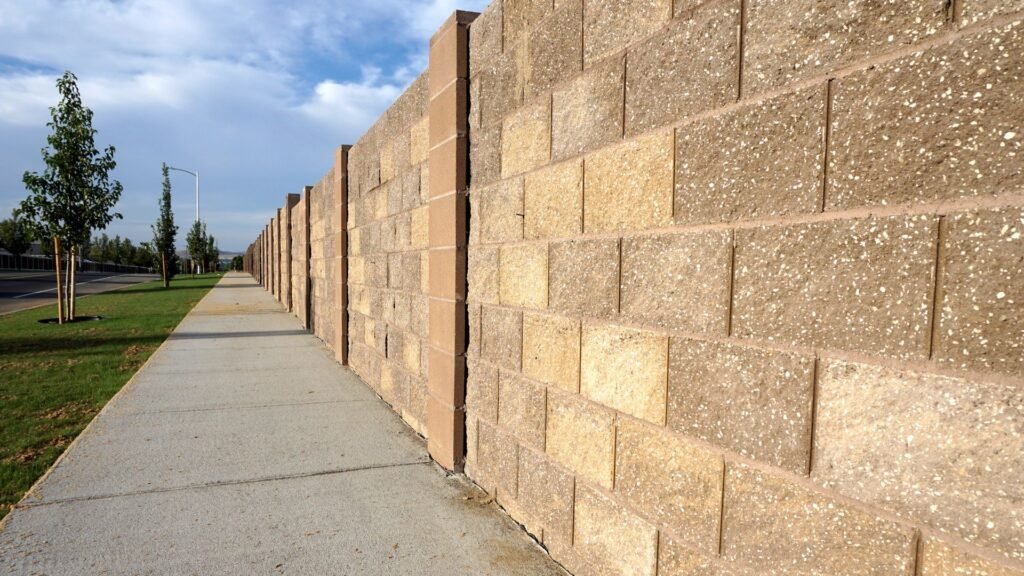
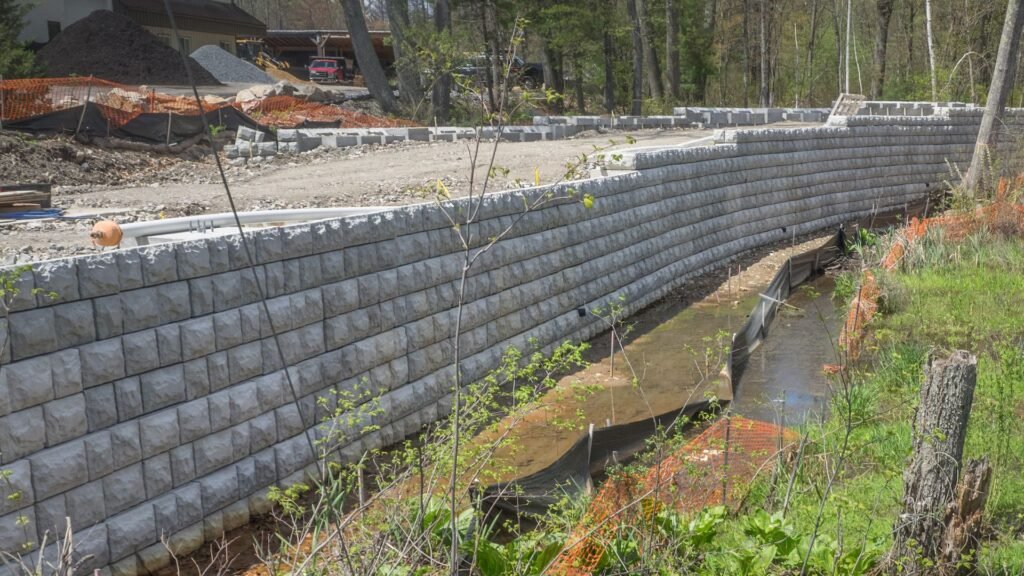
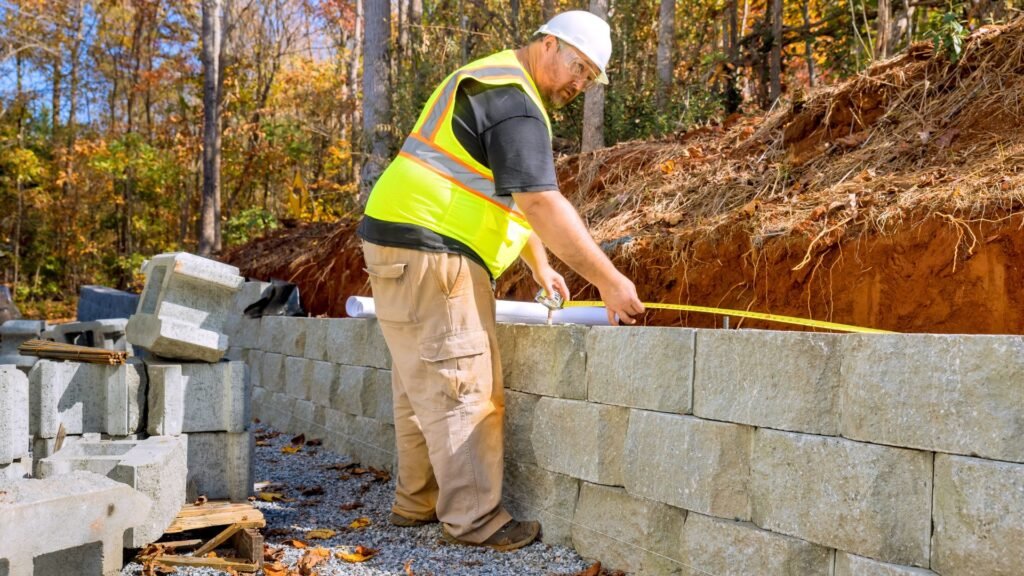
Concrete Block (Keystone) Walls
Concrete block walls, often referred to as keystone walls, are an excellent choice for those looking for durability and a clean, modern aesthetic. These walls use interlocking concrete units that require proper base preparation and alignment.
- Best For: Strong, stylish retaining walls on residential or commercial properties
- Pros: Long-lasting, modern design, structurally reliable for taller walls
- Cons: Requires precise base preparation and heavier labor to install
In Wellington’s seismic zones, these blocks can be reinforced with steel rods and filled with concrete to enhance stability. They are ideal for sloped properties where strength and longevity are key.
Poured Concrete Walls
Poured concrete walls are among the most robust and permanent types of retaining walls. Built by pouring concrete into reinforced forms, these walls are incredibly strong and can withstand heavy loads and shifting soil.
- Best For: High-retaining walls in erosion-prone or steep areas
- Pros: Very durable, clean and modern appearance, low maintenance
- Cons: Higher cost, requires professional installation, longer construction time
In Wellington, where earth movement and drainage are concerns, poured concrete walls offer excellent performance but may require professional input to meet safety and building code requirements.
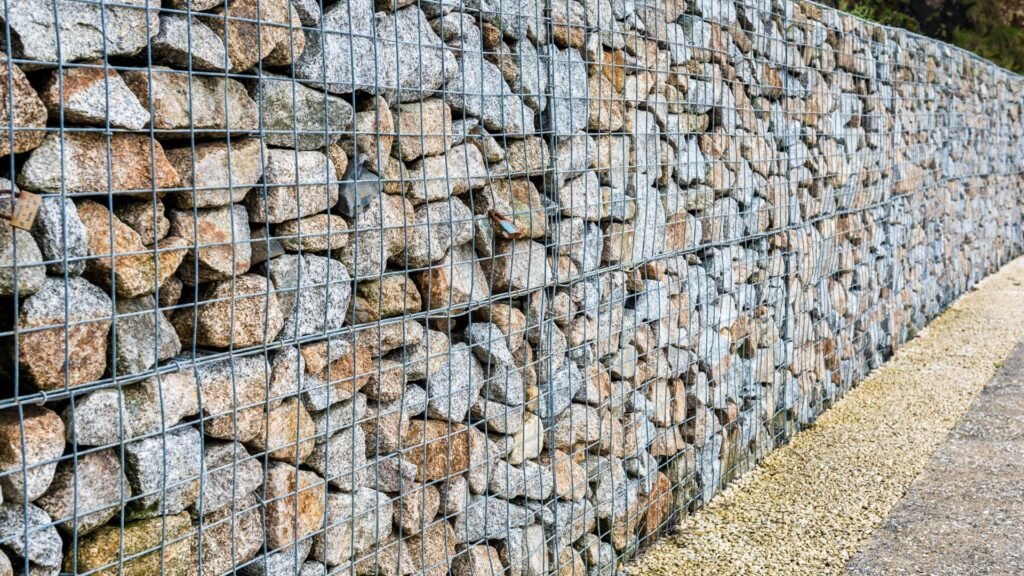
Gabion Walls
Gabion walls are made by filling wire cages or baskets with rocks or stones. They’re a modern and eco-friendly solution that also helps with erosion control and drainage.
- Best For: Erosion-prone areas, environmentally conscious landscaping, modern designs
- Pros: Excellent drainage, flexible with soil movement, visually appealing with natural materials
- Cons: Bulky appearance, time-consuming rock filling, wire mesh may weather over time
These walls are particularly useful on sloped properties and waterfronts around Wellington, where water management is crucial. Plus, they blend beautifully into natural landscapes.
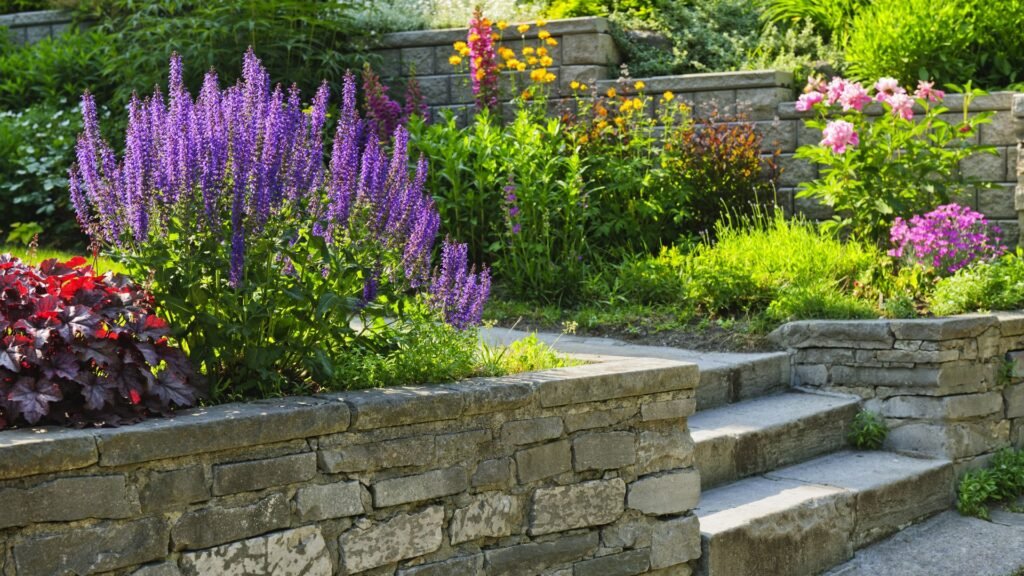
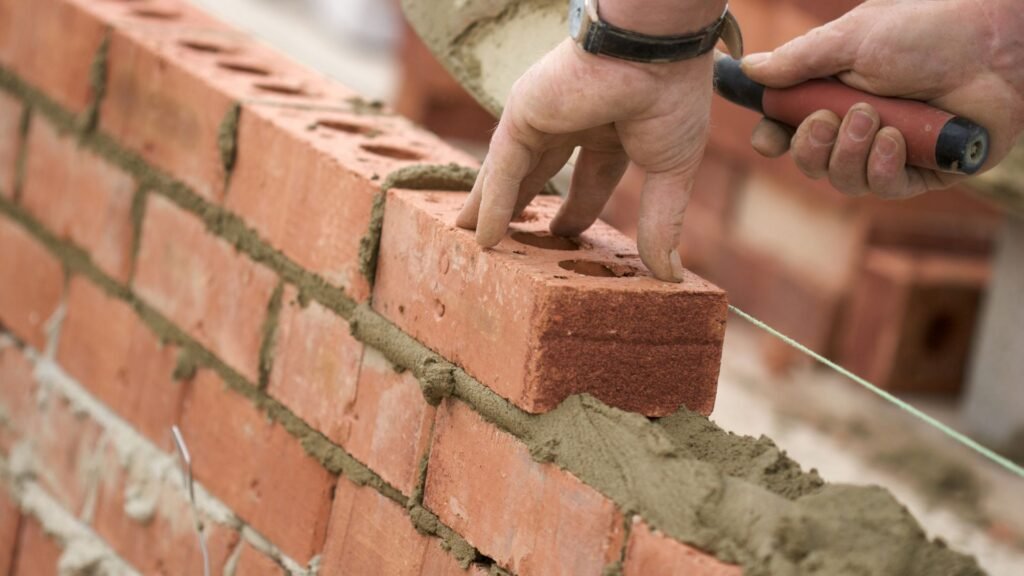
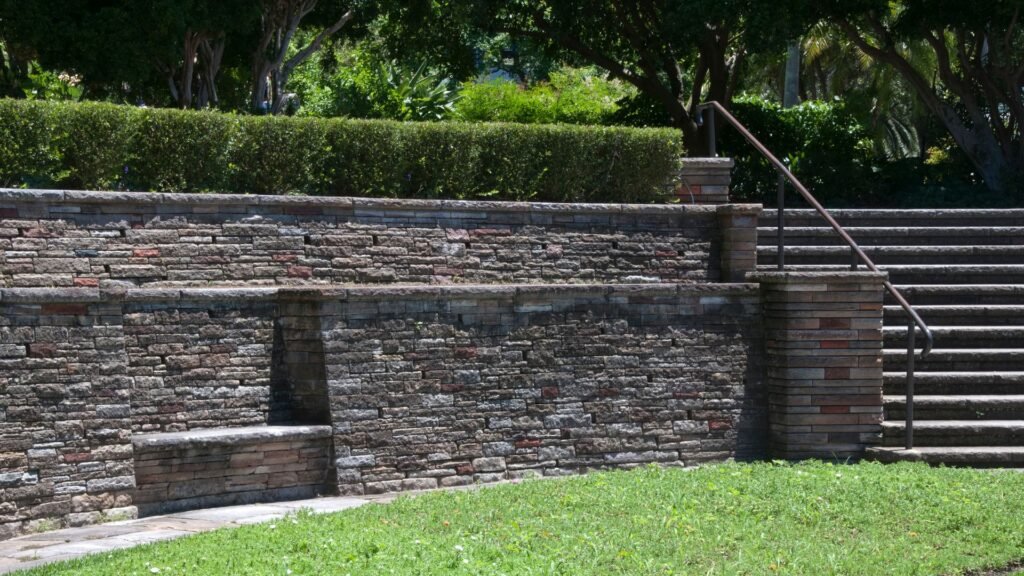
Stone Or Brick Walls
Stone or brick retaining walls bring timeless elegance and are typically found in heritage homes or high-end landscapes. They can be either mortared or dry-stacked, depending on the desired look and structural needs.
- Best For: Decorative landscaping, traditional or high-end properties
- Pros: Aesthetic appeal, long-lasting with proper construction, adds property value
- Cons: More expensive, labor-intensive, may require professional masonry
While these walls look stunning, they often require skilled craftsmanship and quality materials, which can increase the cost and build time. However, they remain a favored choice for homeowners looking to create a visually striking landscape.
Choosing the right retaining wall depends on your goals—whether it’s cost, appearance, ease of installation, or long-term durability. Wellington’s challenging environment makes material selection even more critical, so use this overview to guide your decision and build a wall that’s both functional and lasting.
Core Materials Needed
When it comes to building a reliable retaining wall in Wellington, selecting the right materials is more than just a checklist—it’s the foundation for safety, longevity, and structural integrity. Wellington’s unique climate and topography demand careful planning, especially with its high rainfall, hilly terrain, and occasional seismic activity. Below is a detailed breakdown of the key materials you’ll need, tailored specifically for local conditions and availability.
Primary Structural Materials
The type of wall you’re building will heavily influence the materials you need. Each has its strengths and considerations, especially in a city like Wellington where weather and soil composition play a major role.
- Timber (treated pine or hardwood sleepers): A common choice for DIYers and smaller projects, treated timber is relatively lightweight, easy to cut and install, and affordable. However, timber is more susceptible to rot and insect damage over time, especially in Wellington’s damp climate. To maximize lifespan, always choose H4- or H5-treated pine or durable hardwood sleepers. Local suppliers such as Mitre10 and Placemakers typically stock a wide range suited for outdoor use.
- Concrete blocks or bricks: Known for their strength and clean, modern appearance, concrete blocks are ideal for more permanent walls. They can handle significant load and moisture when installed correctly with mortar and drainage. The downside is that they are heavier and require more labor and equipment to install. Still, they’re readily available across Wellington’s building supply stores and suitable for both residential and commercial landscaping projects.
- Gabion baskets and rock fill: Gabions offer excellent drainage and a natural, rugged aesthetic. These wire mesh baskets are filled with stones or rocks and stacked to create flexible, erosion-resistant walls. They work particularly well in high-drainage areas and are ideal for sloped or erosion-prone Wellington properties. Gabion systems are also increasingly popular due to their durability and minimal maintenance needs.
- Reinforced concrete mix: For walls that need serious structural support—such as those above 1.5 meters or in geotechnically sensitive areas—poured concrete with steel reinforcement provides exceptional strength. It’s more complex to build and often requires professional help, but it performs well in areas with challenging soil or water pressure.
Foundation & Base Materials
A retaining wall is only as strong as the foundation it sits on. The base layer absorbs the weight of the wall and helps prevent shifting, tilting, or collapse, which is particularly important in Wellington’s rain-heavy climate.
- Crushed rock or gravel base: Crushed rock, often referred to as base course, provides essential drainage and a stable footing. This material should be compacted in layers to form a level and load-bearing surface. Using a proper gravel base is non-negotiable in Wellington where the risk of soil movement is high.
- Compacted sand: Sand is sometimes layered over crushed rock to create a smoother surface for laying blocks or sleepers. While not always necessary, it can help with minor leveling and water flow control. However, it should never replace crushed rock as the primary base material.
- Landscape fabric (weed barrier): This is placed beneath and behind the wall to prevent weed growth and soil migration while still allowing water to pass through. In areas with heavy rainfall like Wellington, this barrier helps preserve the wall’s integrity by reducing soil erosion behind it.
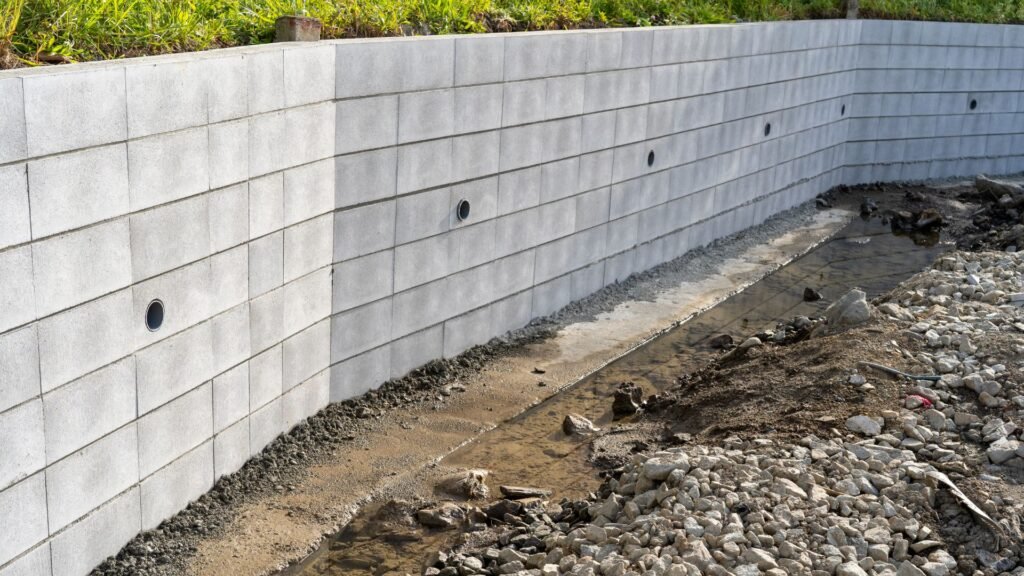
Drainage Materials
One of the leading causes of retaining wall failure is poor drainage. Without an effective system in place, water can accumulate behind the wall, creating hydrostatic pressure that pushes against the structure.
- Drainage gravel: Coarse, clean gravel should be packed behind the wall to allow water to flow down freely and reduce pressure. This gravel acts as a buffer zone and is especially important for timber and concrete walls.
- Perforated drain pipe (aggie pipe): Also known as a French drain, this flexible, slotted pipe sits at the base of the wall to collect and redirect excess water. It should be wrapped in filter fabric to prevent clogging and extended to a safe drainage outlet away from the wall.
- Filter fabric: Used in conjunction with gravel and drainage pipes, filter fabric helps keep soil out while letting water pass through. This is especially useful in Wellington where soil saturation can happen quickly after rainfall.
Fixings And Extras
While often overlooked, the small components that hold your wall together are just as important as the larger structural elements. These extras ensure everything stays securely in place over time.
- Galvanised screws or bolts: Galvanisation protects fasteners from rust, which is crucial in Wellington’s moist environment. Whether you’re building with timber or attaching structural supports, these should be your go-to option.
- Timber spikes or wall ties: These are used to anchor timber sleepers and ensure they don’t shift over time. Wall ties may also be required when attaching different materials or layers together for added strength.
- Concrete adhesive: This is especially helpful when using concrete blocks or bricks. It helps bond layers together and prevents unwanted movement or shifting due to soil pressure.
- Reinforcing mesh or steel rods: For poured concrete walls or block walls over a certain height, reinforcement is essential. Steel mesh and rebar add internal strength, allowing the wall to better resist pressure from the soil and weather over time.
Choosing the right materials for your retaining wall isn’t just a matter of preference—it’s about ensuring long-term performance and peace of mind, especially in a place like Wellington where the environment can be demanding. From solid base preparation and proper drainage to selecting structural materials that suit your property’s needs, every component plays a vital role in the wall’s durability. By investing in quality supplies and taking the time to build it right from the ground up, you’ll end up with a retaining wall that not only looks great but also stands strong for years to come.
Tools You’ll Likely Need
When planning to build a retaining wall in Wellington, having the right tools can make a huge difference in the ease and quality of your project. Whether you’re going the DIY route or preparing the site for a professional, each tool plays a specific role in ensuring your retaining wall is safe, level, and built to last.
- Shovel, Level, Wheelbarrow: These basic tools are essential for excavation and moving materials around the site. A sturdy shovel helps dig out the base trench and backfill soil. A wheelbarrow is key for transporting gravel, soil, and other materials efficiently. The level ensures your wall is straight and balanced throughout the build—something that’s especially important on Wellington’s uneven and sloped landscapes.
- Compactor or Tamper: A properly compacted base is crucial for the stability of any retaining wall. A mechanical compactor or manual tamper is used to compress the gravel or crushed rock base. This prevents future settling and shifting, particularly in areas prone to soil movement or heavy rainfall.
- Circular Saw (For Timber): If you’re building a timber retaining wall, a circular saw is a must-have tool. It allows you to cut sleepers or posts to the right length for tight, secure fitting. Be sure to use a blade designed for treated wood, as this will ensure cleaner cuts and prolong the life of your tools.
- Concrete Mixer (Or Access To Premix): For walls made of concrete blocks or poured concrete, a concrete mixer saves time and energy. Mixing concrete manually is labor-intensive and inconsistent. You can rent a small electric mixer locally or order premixed concrete from a supplier in Wellington to be delivered directly to your site, which is often more efficient for larger walls.
- Safety Gear (Gloves, Boots, Eye Protection): Don’t overlook personal safety. Gloves protect your hands from splinters, sharp edges, and concrete burns. Steel-toed boots provide stability and protect against dropped tools or materials. Eye protection is crucial when cutting timber, mixing concrete, or using power tools.
Take Note: Renting Vs Buying
If you’re only building one wall or working with a limited budget, renting tools can be a smart way to save money. Many hardware and construction stores in Wellington offer daily or weekend rates for tool rentals, including compactors, mixers, and saws. Stores like Hirepool, Kennards Hire, and local Mitre 10 branches often have everything you need without the long-term cost of ownership. This option also gives you access to higher-grade equipment that’s well-maintained and ready to use.
By preparing the right tools before you start, you not only streamline your workflow but also ensure a safer and more professional finish to your retaining wall. Investing a little time in planning your toolkit pays off in durability and peace of mind.
Estimating Costs: What To Budget For
When planning to build a retaining wall in Wellington, having a clear understanding of the potential costs is essential. Budgeting ahead of time ensures that you’re not caught off guard by unexpected expenses and helps you make informed decisions about materials and construction methods—whether you’re doing it yourself or hiring a professional.
Average Material Costs In Wellington
Material prices will vary depending on supplier, quality, and seasonal availability. However, here are some common cost ranges to expect when purchasing materials for a retaining wall project in the Wellington region:
- Treated timber sleepers are typically priced between $30 and $50 each. These are commonly used in timber retaining walls because they’re durable, pressure-treated, and well-suited for New Zealand’s outdoor climate. For a 5-metre wall, you’ll likely need around 10 to 12 sleepers, depending on your design and spacing.
- Drainage gravel, which is essential for a stable foundation and water management behind the wall, usually costs between $90 and $120 per cubic metre. For a wall of this size, expect to need roughly 1.5 to 2 cubic metres of gravel, especially if you’re layering it behind the wall and under the base.
- Perforated drainage pipe, often called aggie pipe, plays a crucial role in redirecting water away from the wall to prevent pressure buildup. This type of piping typically costs around $8 to $12 per metre. A 5-metre wall would generally require a pipe of equal or slightly greater length, depending on your drainage layout.
- If you’re using concrete blocks instead of timber, the cost per block generally falls between $5 and $10. The total number of blocks you’ll need depends on the height, width, and design of your wall, but for a 1-metre-high wall, you could easily use 50 to 70 blocks.
Additional costs to keep in mind include fasteners, such as galvanized screws or wall ties, which could add another $50 to $100 depending on quantity and quality. If you don’t have the necessary tools, renting equipment like a compactor or circular saw may cost you an extra $50 to $100 for the duration of your project.
Labor Costs: DIY Or Hire A Professional?
Choosing to build the wall yourself can lead to significant savings. However, if you opt to hire a professional, labor costs in Wellington generally range between $80 and $120 per hour. The final figure depends on the complexity of the job, ease of site access, and contractor rates. For a small-to-medium-sized wall, labor could account for half or more of the total cost.
While DIY is feasible for smaller walls under 1.5 metres, anything beyond that—especially structures that impact drainage or land stability—may require professional expertise and possibly council approval. Consider the time, tools, and physical effort involved before committing to building it yourself.
Sample Budget For A 5m x 1m Timber Retaining Wall
To help you visualize the potential expenses, here’s an estimated cost range for a basic 5-metre-long, 1-metre-high timber retaining wall in Wellington:
You might spend approximately $300 to $600 on treated timber sleepers, around $135 to $240 on drainage gravel, and roughly $40 to $72 on perforated drainage pipe. Add to that $50 to $100 for fasteners and another $50 to $100 for tool or equipment hire. All in, a DIY build might cost anywhere from $575 to $1,100 in materials and essentials.
If you decide to hire a professional builder, the overall cost could rise to between $1,500 and $2,500 or more, depending on the complexity and labor time required.
Final Thought On Budgeting
Building a retaining wall is an investment in both your landscape and your property’s stability. Spending a bit more on proper materials—especially drainage and foundational elements—can save you thousands in future repairs. Always allow for a buffer of around 10 to 15 percent in your budget for unexpected expenses like material waste, soil movement, or weather delays. With careful planning, your retaining wall can be both cost-effective and built to last in Wellington’s demanding conditions.

Wellington-Specific Tips
When building a retaining wall in Wellington, there are several location-specific factors that can significantly impact the design, material selection, and approval process. Wellington’s unique terrain, weather patterns, and seismic activity mean that homeowners and builders need to take extra precautions to ensure that retaining walls are safe, durable, and compliant with local regulations. Below is a detailed breakdown of the key considerations to keep in mind before you start your project.
Council Permissions & Building Consent
One of the first things to check before starting construction is whether your retaining wall requires building consent. In Wellington, as in most parts of New Zealand, building consent is typically required if your retaining wall is over 1.5 meters in height or if it supports a load such as a driveway, fence, or structure. Even if your wall is shorter, it’s wise to confirm requirements with the Wellington City Council, as certain zones or design complexities may still require consent.
Keep in mind that failing to get the necessary permissions can result in fines, forced removal of the wall, or issues when selling your property. The consent process may involve submitting engineered plans, especially for larger or more complex walls. If you’re unsure whether your project qualifies, it’s best to consult with a licensed building practitioner or reach out directly to the council’s building services team for guidance.
Erosion-Prone Zones – Check With Wellington City Council
Wellington’s hilly and often unstable geography means that erosion is a significant concern, particularly in areas with steep slopes or poorly draining soil. If your property falls within an erosion-prone or flood-sensitive zone, your retaining wall may require additional engineering to ensure long-term stability.
The Wellington City Council can provide information on whether your property is in a designated erosion risk zone. This step is essential, especially if your retaining wall is being used to create flat land for gardens, driveways, or outdoor structures. Walls built in erosion-prone areas need to be carefully designed with proper footing depth, drainage systems, and potentially even vegetation or geotextiles to help stabilize the surrounding soil.
Seismic Considerations: Extra Reinforcement For Quake Resilience
Another major factor to consider in Wellington is seismic activity. The region is located on a major fault line, making earthquakes a real and ongoing risk. This reality means retaining walls need to be built with earthquake resilience in mind, particularly those that are tall, support heavy loads, or are constructed near property boundaries.
To ensure seismic safety, walls often require additional steel reinforcement, deeper footings, and flexible joints that can absorb ground movement without cracking or failing. Reinforced concrete walls tend to perform best in seismic zones, but even timber walls can be improved with proper anchoring and drainage strategies. If your wall is subject to consent, the council may require a structural engineer to sign off on the design to meet earthquake safety standards.
Building with seismic resilience doesn’t just protect your wall—it also protects your home, your neighbors’ properties, and your long-term investment.
Final Thoughts
Wellington is one of the most beautiful cities in New Zealand, but its challenging landscape requires thoughtful planning when it comes to construction. By understanding and accounting for local regulations, environmental risks, and seismic factors, you can build a retaining wall that is both compliant and capable of withstanding the test of time. Always consult with local authorities and qualified professionals before starting your project to ensure a smooth, safe, and successful build.
Should You DIY Or Hire A Pro?
When it comes to building a retaining wall in Wellington, one of the biggest decisions homeowners face is whether to take the DIY route or hire a professional. Both options have their merits, and the best choice depends on your budget, skill level, and the complexity of your project. This section breaks down the pros and cons of each approach, safety factors to consider, and how to choose a reliable tradesperson in Wellington if you decide to go pro.
The Case For DIY: Freedom, Savings, And Satisfaction
For many Kiwi homeowners, building a retaining wall themselves is an attractive option. It offers more control over the project and can significantly reduce labor costs. If the wall is relatively low (under 1.5 meters) and doesn’t require council consent, a DIY approach can be a practical and rewarding challenge.
DIY pros:
- Cost savings on labor
- Flexibility to work at your own pace
- Personal satisfaction and learning opportunity
However, DIY isn’t without its risks. Mistakes in drainage, base preparation, or structural alignment can lead to wall failure—especially in Wellington’s unpredictable weather and varied terrain. Even a minor miscalculation can mean starting over or worse, facing erosion or property damage down the line.
When Hiring A Professional Makes More Sense
If your retaining wall is taller than 1.5 meters, supports a driveway or structure, or is located in a slope-prone area, hiring a professional is the safer and smarter choice. Wellington’s hills and clay-heavy soils can complicate excavation and stability, making experience and technical knowledge invaluable.
Hiring a local specialist ensures:
- Proper site assessment and soil evaluation
- Compliance with local building regulations
- Durable construction that meets safety standards
Yes, it’s a bigger upfront investment, but it can save you from costly repairs or fines in the future. Professionals also bring equipment and efficiency, often completing in days what could take a DIYer weeks.
Safety Should Always Be A Top Priority
Retaining walls are more than just landscape features—they hold back tons of soil, water, and pressure. If built incorrectly, they can collapse and cause serious damage. That’s why New Zealand’s building code requires walls over 1.5 meters to have engineering approval and, in many cases, a building consent.
Whether you DIY or hire a pro, the following safety elements are essential:
- A compacted gravel base for stability
- Proper drainage to prevent hydrostatic pressure
- Reinforcements (like steel rods) in concrete walls
- Following height limits and setback distances
For higher or more complex walls, it’s best not to compromise. A licensed contractor brings not just tools, but know-how that keeps your home and landscape safe.
Tips For Finding A Qualified Tradesperson In Wellington
If you decide to work with a contractor, choosing the right one is crucial. Look for retaining wall specialists who have experience with Wellington’s specific soil types and terrain. Don’t just go with the cheapest quote—focus on proven experience, good communication, and quality workmanship.
Here’s what to look for:
- Licensed building practitioners (LBP) or engineers for large walls
- Local references or past projects in the Wellington region
- Transparent quotes with detailed material and labor breakdowns
- Positive reviews on platforms like NoCowboys or Builderscrack
Meeting the contractor in person and asking the right questions can go a long way toward avoiding miscommunication or unexpected costs. Always check if your chosen tradesperson understands local council requirements and can help you with the consent process if needed.
Final Thought
In the end, the choice between DIY and professional installation comes down to your confidence level and the demands of the project. For smaller, straightforward walls, rolling up your sleeves might make sense. But for larger builds, tricky slopes, or high-retaining structures, investing in a pro is often the wisest—and safest—decision. Either way, having the right materials and planning carefully is key to a successful result.
Final Tips Before You Build
When it comes to building a retaining wall in Wellington, the final preparations can make the biggest difference between a wall that lasts decades and one that fails within a few years. While choosing the right materials is essential, how you plan, prep, and build around those materials is just as critical. Here are some important final tips that every homeowner or DIY builder should keep in mind before the first shovel hits the ground.
Don’t Skip Drainage – It’s The #1 Failure Point
Many first-time builders underestimate how powerful water can be. Without proper drainage behind your retaining wall, rainwater can build up and create hydrostatic pressure that pushes against the wall. Over time, this pressure can cause bowing, cracking, or even total collapse. Wellington’s often wet and unpredictable climate makes drainage especially crucial. Always include a layer of drainage gravel, install a perforated drainpipe (also called an aggie pipe), and use filter fabric to prevent soil from clogging the drainage system. Even with the strongest materials, your wall will fail without a way for water to escape.
Plan For Future Landscaping
Before construction begins, take a moment to visualize how your retaining wall will fit into the rest of your landscape. Will it support a garden bed, a patio, or another structure? Thinking ahead can save you from costly modifications later. For example, if you’re planning to install a garden, you may want to route irrigation through or around the wall. If the area above the wall will be used as a footpath or seating space, reinforce the top layer and make sure the design includes appropriate safety features like capping or railing.
Buy 10–15% More Material Than Estimated
No matter how accurate your measurements are, it’s always smart to purchase a bit more material than you think you’ll need. Cutting timber or concrete blocks often results in offcuts that can’t be reused. You may also encounter damaged pieces or minor miscalculations during installation. By buying 10 to 15 percent extra, you ensure you’re not scrambling to find matching materials midway through the project, which can lead to delays—especially if supply availability is an issue in Wellington. Having some surplus also gives you backup materials for future repairs or extensions.
Taking the time to follow these tips not only improves your wall’s performance and longevity but also ensures your building experience is smoother and more cost-effective. A little planning now can save a lot of stress (and money) down the road.
Whether you’re tackling a DIY project or looking for expert help, we’ve got the materials, advice, and local know-how to guide you every step of the way. Visit Retaining Walls Wellington to explore quality retaining wall supplies, expert support, and everything you need to build with confidence in Wellington.
FAQs: About Materials Needed For A Retaining Wall In Wellington
What are the most essential materials for building a retaining wall in Wellington?
The key materials include structural components like treated timber, concrete blocks, or gabion baskets; a solid base layer using crushed rock or gravel; drainage materials such as perforated pipe and filter fabric; and fastening elements like galvanized screws, wall ties, and concrete adhesive. These materials are especially important in Wellington’s hilly and wet environment.
Why is drainage important when building a retaining wall?
Poor drainage can cause water pressure to build up behind the wall, leading to structural failure or collapse. In Wellington, where rainfall is frequent, installing proper drainage—like gravel backfill and a perforated drain pipe—is crucial for long-term wall stability.
Can I build a retaining wall in Wellington without council approval?
In many cases, yes—if the wall is under 1.5 meters high and not supporting additional loads. However, it’s always best to check with the Wellington City Council, as regulations can vary depending on location and soil conditions.
What type of retaining wall is best suited for Wellington’s terrain?
Concrete block and timber retaining walls are popular choices due to their strength and adaptability. For steep slopes or erosion-prone areas, gabion walls or reinforced concrete may offer better durability and stability.
How much do materials for a small retaining wall typically cost in Wellington?
Costs vary by material, but a small timber wall (around 5m x 1m) may cost between $500–$1,200 in materials alone. Concrete block walls tend to be more expensive due to the need for mortar and structural reinforcement.
Where can I buy retaining wall materials in Wellington?
You can purchase materials at local building suppliers such as Mitre 10 Mega, Placemakers, Bunnings, and specialist landscape yards around the Wellington region. Some suppliers also offer delivery and bulk discounts.
Can I build a retaining wall myself, or should I hire a professional?
You can build a low-height wall yourself if you’re confident with tools and building techniques. However, for walls over 1.5 meters or those in high-risk zones (e.g., near slopes or drainage channels), it’s recommended to hire a licensed professional for safety and compliance.
How do I prepare the base for a retaining wall?
Start by digging a trench below ground level, then fill it with compacted crushed rock or gravel to create a solid base. The foundation should be level and at least 150–300mm deep to support the weight of the wall and prevent shifting.
How do I ensure my retaining wall lasts a long time?
Use high-quality, weather-resistant materials like treated timber or reinforced concrete. Include proper drainage behind the wall, maintain it regularly, and address signs of movement or water buildup early to prevent long-term damage.
What’s the difference between gabion, timber, and concrete block walls?
Gabion walls use wire baskets filled with rocks, offering excellent drainage and a natural look. Timber walls are easier to build and cost-effective but may degrade faster in wet conditions. Concrete block walls are durable and modern-looking but require more preparation and materials to install correctly.
Conclusion
Choosing the right materials is the foundation of a strong, stable, and long-lasting retaining wall—especially in a location like Wellington, where weather, terrain, and soil movement can create unique challenges. From timber and concrete blocks to proper drainage and foundational support, each component plays a vital role in the wall’s durability and performance. Before starting your project, make sure you’re well-prepared by understanding not just what materials you need, but why they matter in the local context. To help you get started on the right foot, we’ve put together a free downloadable material checklist that covers all the essentials. It’s perfect for planning your build, sourcing supplies, or discussing options with a contractor. If you’re still exploring ideas or looking for practical tips, be sure to check out our related resources—like our retaining wall inspiration gallery, step-by-step building guides, or contact us directly for expert advice and material estimates tailored to your Wellington property.